Tools

Bosch 1200w Plunge Router POF 1200 AE
Not an expensive router, but it does the job. Variable speed and a 55mm plunge depth which is plenty. Only one issue with it and that's how it plunges. As it has a lever to adjust the plunge depth, its very jerky and can produce circular marks in the wood. Really needs a better motion for the plunge.

Dewalt 18V XR COMPACT BRUSHLESS HAMMER DRILL DRIVER
Nice and powerful drill, really good for guitar making. Smooth action with variable speed.

Evolution R185CCSX 185mm Circular Saw
I have created a table saw using this saw. I mounted it upside down and encased it with a cable tie to hold the power button in. Nice and powerful for cutting the wood.

Bosch Orbital Sander
Really nice sander. The default sanding discs are not any good, so I bought some mesh ones and they are 100% better. They get more off and less dust.

Fret Ruler
This is used to mark out the fret slot locations on the fretboard.
Jigs
All my jigs are designed by me in Free CAD, 3D Printed and attached to wooden bases. This way I Get good accuracy.

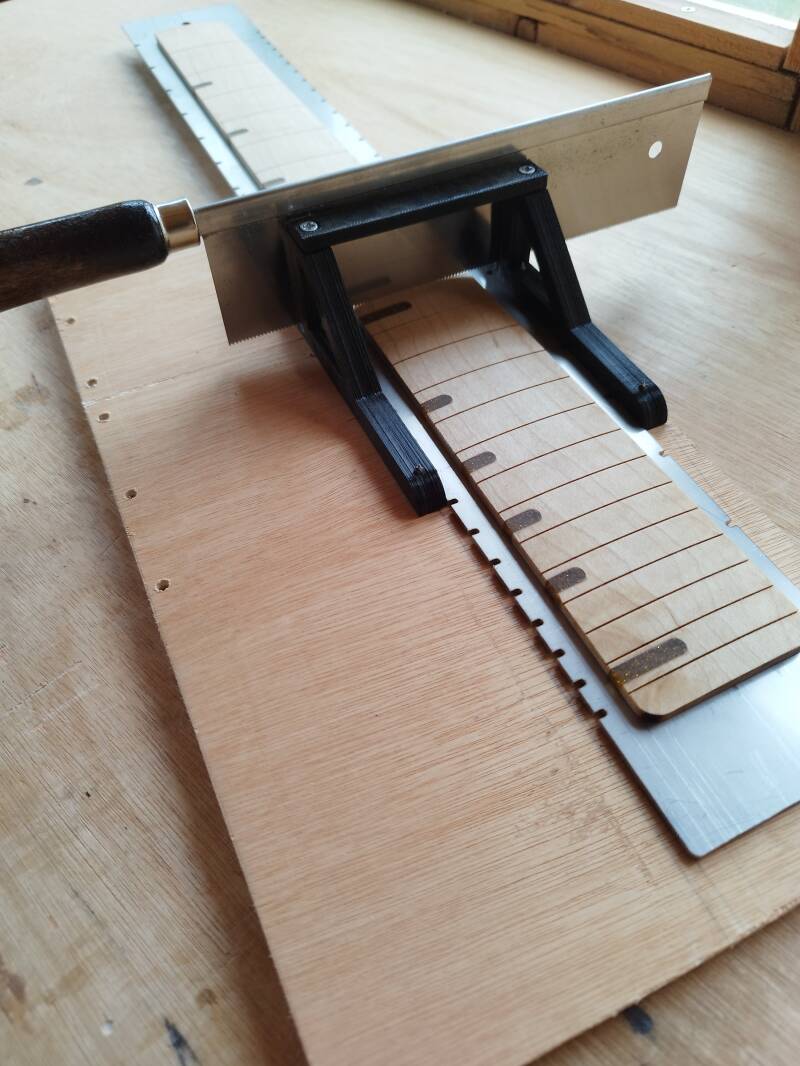
Fret Slotting
I stick a fretboard onto the fret ruler and align the fret ruler up with a pin in the slotting jig. Using a fret saw, I cut the fret slots, the move the ruler to the next position and cut the next slot, and so on.

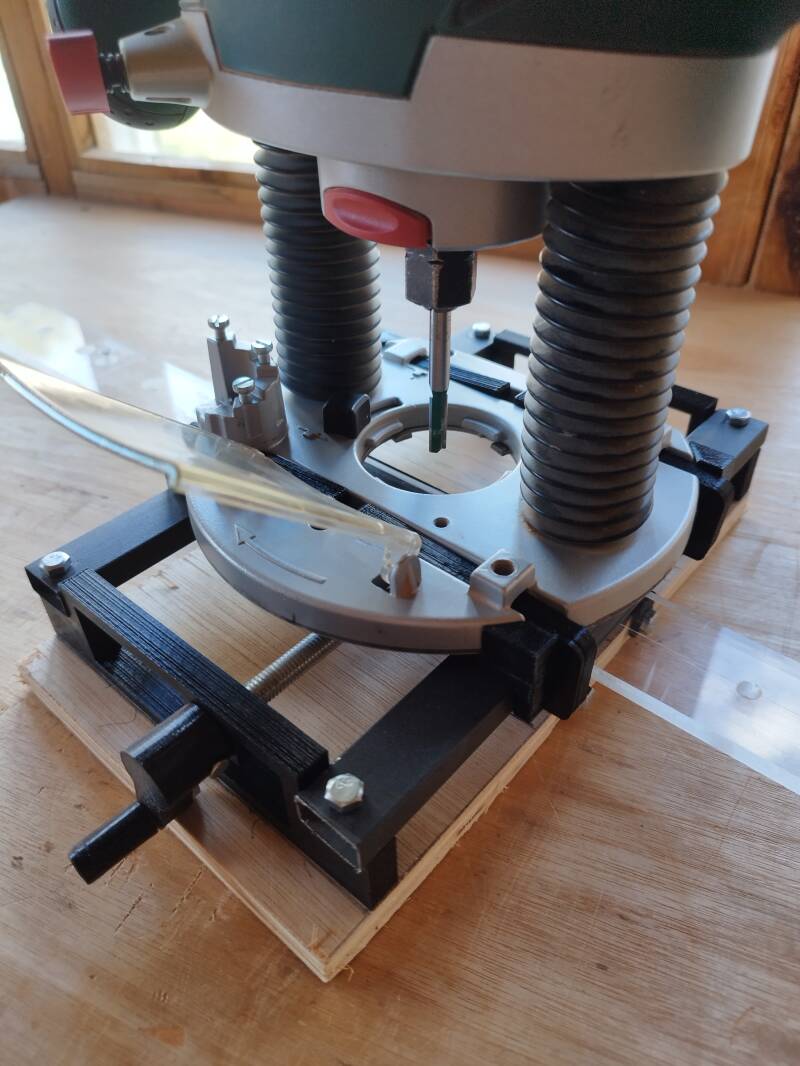
Fretboard Radius
My Bosch router attaches to the sled which runs on bearing rollers running over the radius arc on the base, and this runs the length of the fretboard which is stuck down to a wooden bottom. The router bit cuts out a radius on the fretboard. It produces a really nice radius and does 95% of the work. I have 2 of these, a 12 inch and a 16 inch. Just needs sanding then.

Neck Profile
Once a neck has been routed to the outline of a neck, it is then stuck onto the platform on the rotating bar on the jig. My router attaches to a sled which runs along the runners on the top of the jig, and the router bit routs out the neck profile. I have added two adjustments to each end piece of the jig which moves the platform laterally to make it central.

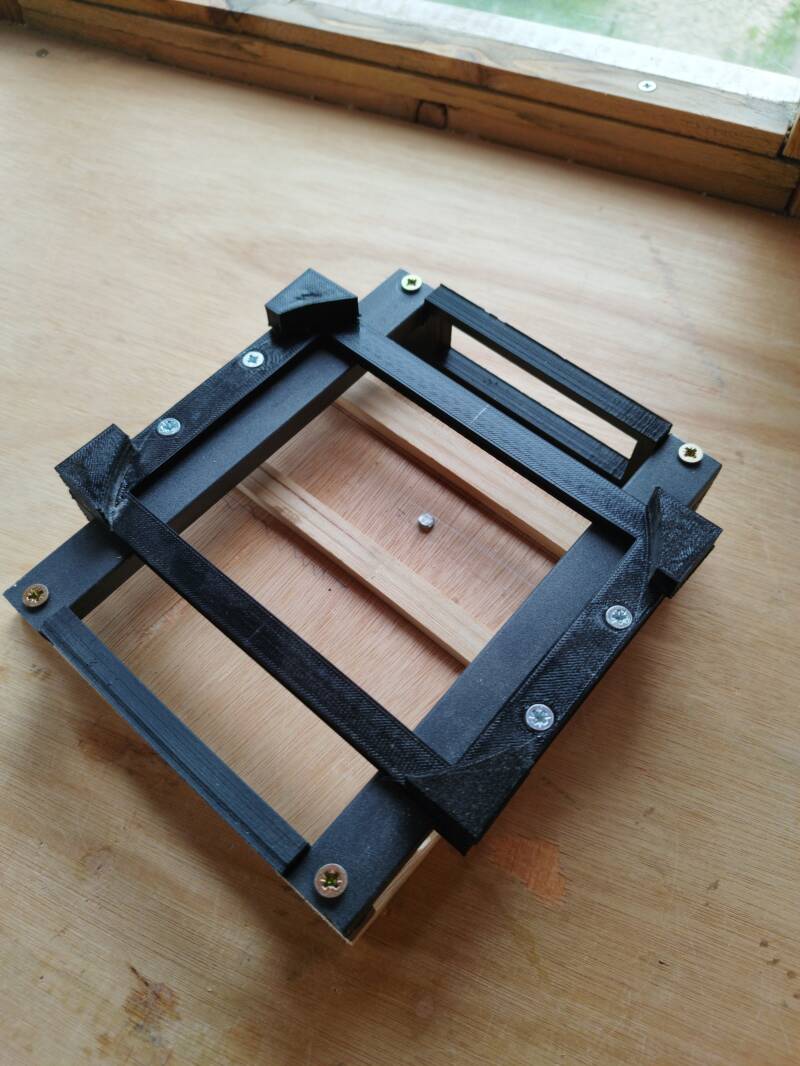
Fret Marker for Centre Dots
My router attaches to this jig as shown in the 2nd picture. I stick the fretboard down on the Perspex slider in line with the centre line. The Perspex slider runs along the rails and holes in it slot over the pin in the middle of the runners. This lines the fretboard up where the markers have to be and doesn't move. The router is just plunged to create the marker, always keeping them in line.
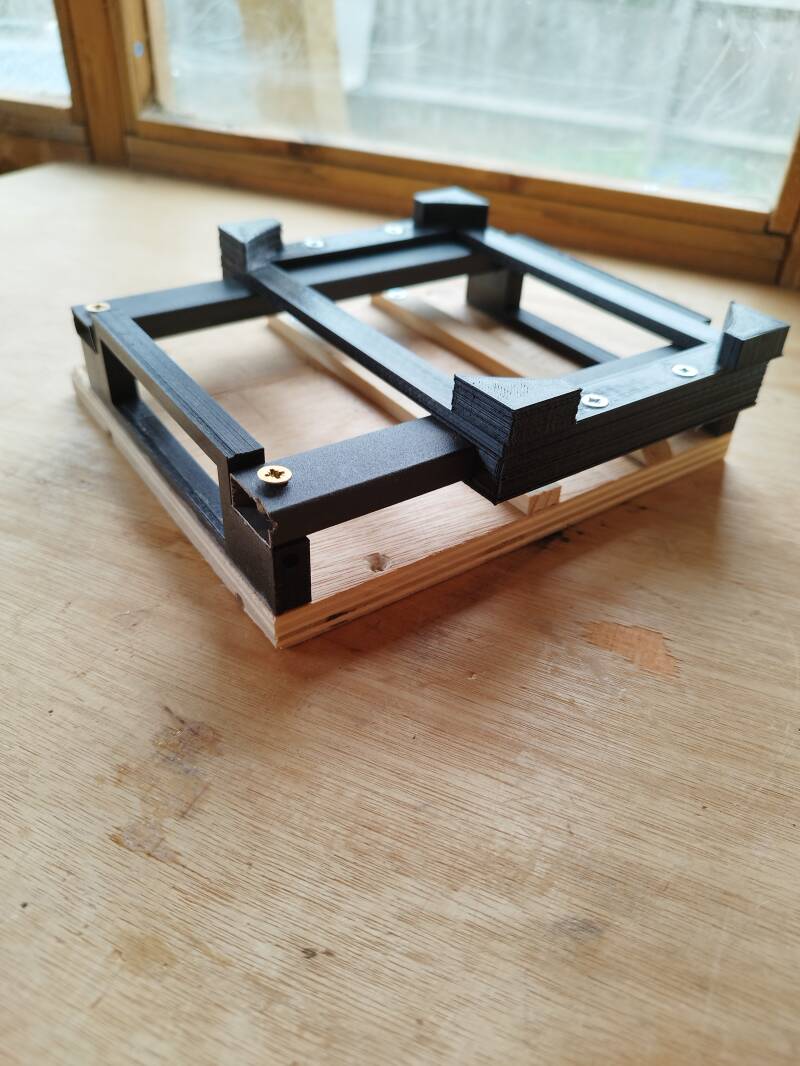
Fret Marker for Sides of the fretboard
This is basically the same as the other marker jig, except the router sled is moved along the rails by hand, making the side markers.
Create Your Own Website With Webador